In this video I'll show you how to convert
pretty much any desk into a desk PC. I based my build on a tiny Ikea MICKE desk,
which costs less than $40 making this probably the cheapest desk PC you can get. Huge thanks to AMD for hooking me up with
their top of the line Ryzen 1800X CPU - it was actually team red's representative who
approached me with an idea of an affordable DIY desk PC. Let's get started...
When adapting a drawer to house PC components,
you must ensure enough area to fit all the hardware while preserving space for your legs
to sit comfortably. Based on my experience, 10 cm provide optimal
balance between the net volume space and legroom. To fulfill this requirement, you must use
a PCI-E riser as the regular sized GPU will stick out too much when inserted directly
into the PCI-Ex slot. This time around I decided to air cool the
CPU - given the height restriction, I went with the Noctua low profile heatsink which
should be enough to handle those 8 physical cores.
Airflow is ensured by a set of four 92 mm
fans which bring some air in through the vents in the bottom and two 12 cm exhaust fans at
the back. As far as tools are concerned, you might need
quite a few. A power drill along with some wood bits, 60
mm circle saw, as well as 35 and 18 mm bits. You will also need a jigsaw or something else
to cut holes for those 120 mm fans, a soldering iron to sort out powering those exhaust fans
and a hot glue gun.
The list of materials includes: a piece of
4 mm thick plywood to reinforce the drawer , a handful of T-nuts and bolts,
tulle material or something else that can act as a basic air filter, some zip-ties,
aluminum pipe to make spacers, 4 by 2 cm angled aluminum bar, a molex to four
3 pin fan connector splitter and another fan splitter for for the exhaust fans along
with some wire to extend those cables, and optionally some cable management accessories. I started just as most of my projects begin
- from putting everything into the drawer to figure out exact location of each component. I marked the position of intake fans, full
size ATX motherboard mounting points, location of the SFX power supply and the riser cable
assembly. At this stage, make sure that your GPU power
cable is long enough to reach to the video card.
I myself am using a simple GTX1050, which
takes all the power it needs from the PCI. Ex slot, but if you're using anything more
power hungry, you might need to order a custom cable for a modular PSU or a cable extender. Then, I disassembled the drawer to prepare
the bottom and the back pieces for cutting. I outlined the power supply and established
the center for the fan intake cut out.
Next was the air intake up front... And the
GPU fans intake to the left of the motherboard. In such confined space, a blower style design
cooler would be your best choice, but a custom cooling will also do its job, just make sure
to provide the fans with enough air. With everything traced out I moved onto cutting.
I drilled a pilot hole and used a cheap hole
saw bit to cut a 60 mm opening for the power supply fan air intake. Next, I drilled a set of six 35 mm cut outs
under the GPU. For the front air intake, I figured cutting
a bunch of holes will preserve better rigidity of the bottom piece that's only 4 or so mm
thick. So, I established centers for each and drilled
a row of 16 mm holes.
I also had to make openings in the back wall
of the drawer for the GPU, motherboard IO. Ports and the PSU exhaust and power connector. I traced the outline of each and marked drilling
points in all corners. I drilled 12 mm holes and cut the rest using
a jigsaw.
After removing the material, I treated edges
with Dremel sanding bit to even lines a little bit. I cut a piece of 4 mm plywood to make the
bottom thicker so the t-nuts that I'm using to facilitate the mounting points don't rip
the original element. I applied some glue and secured the plywood
with a few staples. Next, I drilled motherboard and PCI express
assembly mounting points using a 5 mm bit.
Then, I fixed an M4 T-nut in each hole...
And put the drawer back together. At this point, I decided to attach three PVC
pipes supports for cable management purposes. I'm obviously not a native speaker so I'm
not really sure what these are called. To dust proof all the intakes I used tulle
textile that my wife bought for her wedding skirt.
I cut the material to size, fixed each end
to a small piece of wood using a staple gun and attached it to the bottom of the drawer
using hot glue. When fixing the front fans intake, it turned
out that you can actually hot glue the material directly, without the wooden pieces. Then, I hot glued the intake fans together. That's when I decided to run the cables under
the drawer for clean looks.
So, I marked positioning of each fan's cable
and drilled 4 mm holes. The diameter was large enough to fit the connector
so I removed the plugs, threaded each cable and replaced all connectors. I drilled four holes to zip tie fans assembly
in case hot glue would be insufficient... Applied some glue and fixed the fans in place.
Next, I marked the exhaust fans cut outs,
drilled pilot holes and cut the desk using jigsaw. This would have been much easier if the desk
was disassembled - so if you're starting fresh, don't bother to put the desk together before
you cut these openings. Then I screwed both fans to the back... After
double-checking the airflow direction.
After that, I moved the rails attached to
the desk 2 cm from original mounting points, to lower the drawer so there's enough clearance
for intake and CPU fans. Just be aware that in this area, there's only
a few millimeters of material and it might be that the rails will loosen a bit after
abusing the drawer and you might have to rethink the assembly. To cover the gap at the top that resulted
from lowering the drawer, I got an angled aluminum 4 by 2 cm. I measured at cut it as wide as the front
of the drawer is.
Then I removed some material at each end so
the extension doesn't interfere with the side walls. Next, I drilled two holes on either side for
screws. I made the holes larger to ensure some room
for adjustments. I drilled pilot holes in the front piece and
screwed the extension to it.
To further dust proof the desk, I attached
furry stripes that I think are used in wardrobe furniture. I trimmed the side stripes as the gap between
the desk and the front of the drawer was a little too tight. Finally, I moved onto assembling components. I won't be getting into the PC building details
- there's hundreds of guides available.
The motherboard sits on spacers that I made
from aluminum pipe. It's a really awesome piece of hardware that
was also a gift from AMD. The PCI express riser is fixed on a pair of
longer spacers, ensuring enough clearance for the GPU cooling. The GPU slides right into the slot and it's
secured to the back-mounting piece with an M3 bolt.
I secured the power supply with some hot glue
and stuck the SSD to the side with a piece of double sided tape. After connecting ATX and CPU cables, I drilled
three more holes one right next to the front fans assembly, another one by the case
front panel pins cluster and at the back for the exhaust fans. I took one of the splitters and used pliers
to squeeze the metal contacts and free the cables from the connector. I run the cables through the hole and replaced
the connector.
I connected all four intake fans, and managed
the excess of cables with a combination of zip ties and zip-ties anchors. Next, I did some soldering to extend the exhaust
fans wiring which I decided to power off of one of the system fans headers on the motherboard. This motherboard has a power button on the
PCB but I still connected a power switch to the front, so I don't have to pull the drawer
out to turn the computer on. You can salvage such switch from an old computer
case or get one in electronics store for really cheap.
Since the original rails don't allow to pull
the drawer out completely, I put the drawer in place and crawled under the desk to connect
all the cables. And this is it - probably the cheapest, fastest
8 core desk PC out there. Operating temperatures are very reasonable
the Ryzen CPU idles at 32 degrees and warms up to around 60 under full load, which
is pretty amazing. Now, the problem is that this system isn't
very quiet due to the fact that the front fans are missing any kind of RPM control.
So I would suggest adding a fan controller
or maybe powering fans off of the 5V rail. Also, you can consider getting finger guards
for the exhaust fans which will prevent cables from hitting the blades when closing the drawer
in case of sloppy cable management. Thanks again to AMD for sending over the Ryzen
1800X - it's an absolute beast and a perfect choice for power users. Thanks for watching, and I'll see you in the
next one..
What's up guys, I'm randomFrankP, today, I'm gonna be showing you how to build a gaming PC step by step This is not restricted to just a gaming PC any PC you'll be building will be following these instructions And I know that thought of this if you don't know what you're doing could be very intimidating, but honestly It's probably a lot easier than you think and I'll be going through all the steps here from start to finish And I really hope it helps you out if you see any the products or hardware you like I will have everything you see Listed in the description down below so you can check it out but let's start this off the case you're gonna be using for this is the Corsair crystal series 5 70 X. RGB case it is ATX so we're going with an ATX build And I love the all tempered glass look to it now first things first Unboxed your motherboard because this is where the majority of the build is gonna Take place carefully take it out of the anti-static wrap and place it on top of the box for now But before you do anything else because this is something that is easily forgotten take the i/o shield from the motherboard box Simply snap this into place on the back of your PC case like I'm showing here This is we're gonna have access to all your motherboard supports and connections and trust me just do this now So you don't forget it later on after the motherboard is already installed Next it's time to grab your CPU. And the processor itself along with most likely a fan will be inside the box now be very careful when handling this because the bottom of the chip is Very fragile in the entire build could get ruined if this gets damaged as you see here on this Ryzen 7 1700 CPU the pins are very tiny and fragile back to your motherboard pull the lever on the socket Backwards to open it up now on the CPU. You'll see a little arrow in the corner But so you can align it with the indicator on your motherboard for a proper install in the right orientation Gently place it down Do not add force if it doesn't just lay into place pick it up and realign it remember be very careful then from here you Close the shield and the lever to secure the chip now it might seem like you're adding a little excessive force when you're closing this Lever, but don't worry.
This is normal. Next is installing your CPU cooler If you have a stock cooler that came along with your CPU it's gonna have some Pre-installed thermal paste on the bottom try not to touch or smear this But in case there isn't any that's pre-installed and it came with it inside the box Or if you bought your own try to put no more than a pea-sized on the sea You from here this stock color just locks into place of those four pins They line up at the holes that are cut out on the motherboard I do want to mention that depending on whether you're building an AMD or Intel build the coolers might be different the resort to your Motherboards manual or your coolers manual if you need additional instructions attached to your cooler is gonna be a four pin fan Cable simply locate the CPU fan connector right at the top of your CPU and plug it in. This is now gonna Give your fan power now real quick if you bought a different fan cooler Or if you have a liquid a i/o resort to that manual because like I said before AMD and Intel different on installation And they include their own brackets and mounts so just resort to your manual for that like I said for this We're just going with the stock fan cooler that came with our Ryzen. Chip next is probably the easiest part of building your PC.
That's installing the RAM. Locate the DIMM slots here on your motherboard and line up the notch on the bottom of the RAM to its respective Orientation whether you're installing one two or all four sticks of Ram you want to install them in the proper read or like I'm showing You now but since we're installing four six the course revenge is RGB RAM for 32 gigs total We're filling all the slots here with some RGB goodness if you installed a ram correctly with a little force the brackets on each side Will snap into place securing it? Now we're going to be putting the motherboard inside the case and make sure you have your case the side panels taken off obviously most cases nowadays Do have pre-installed motherboard standoffs so align your board with the standoffs inside. Placement for this will vary depending on if you have an ITX or an ATX motherboard And if there are no standoffs installed in your case use the ones that are most likely supplied with your cases packaging and screw them In make sure your motherboard is lined up with the i/o shield in the back of the case for a proper fit then screw it Down to lock it all in the place now do not over tighten these screws because you don't want a chance cracking your motherboard Now while we're here your pre installed fan exhaust should have a cable lying free You can just plug this into an available fan port on your motherboard Ours is labeled system fan towards the top right Although place one of these will vary on every motherboard now Before we install the graphics card now is a good time to install the motherboard Connections from your case since you'll have more room to work with Running along the backside of your case you're going to have bundles of cables and connectors to need to be plugged in find your USB. And HD audio cables and locate their matching spot on the bottom of the motherboard But the rest of the tiny pins are.
Now from here It's really just a matching game as each pin is labeled all I have to do is plug them into the correct spot Some of these pins are very tiny and it might be hard to read If you're having trouble reading these or finding where they go again Just resort to your motherboards manual because it's gonna be a much easier diagram its laid out for you And I'll show you where everything goes you can have a big USB 3.0 Connector lying free if your case features this and this two plugs into its matching spot once. That's all done You'll not have access to your cases i/o buttons like the power reset and all the USB connectors And your PC will have power and while we're here again Because this is always easier to install before the GPU it's now a good time to connect your hard drive or your SSD. Some cases have mounting slots or SSDs as well as standard hard drive bays in the back But since we're just using an SSD simply mounted here your motherboards also gonna come with a SATA cable Which will connect your SSD to the motherboard itself? But first plug in a tiny l-shaped connector, and then connected to your motherboard SATA ports on the front These are usually towards the right side of the motherboard so you can have easy access to wrap the cable to it now It's time for the graphics card And it's really simple Using a screwdriver or your fingers move the screws holding in the top two brackets on the back of the case This is where you're gonna have access to HDMI DVI and DisplayPort connectors That's gonna be for your monitor Very similar to how we install the RAM match up the notch on the back of your GPU to the PCIe slot on the motherboard With the fans on your GPU facing downward You'll feel it snap into place and the connectors will be lined up with the rear of the case Now use those same screws to secure the GPU to where those brackets were to secure it This is the msi gtx 1070 TI so it's a newer card And it's definitely a solid pickup if you want something similar to the 1080, but at a cheaper price and don't worry We're pretty much all but done take out your power supply and locate the cables you're gonna need This is depends on if you have a modular PSU or not our CX 750 and from Corsair is modular and has 750 watts of power which is gonna Be more than enough power for this build if your power supply is not modular then all the cables are already attached for you We're gonna need a 8 pin and a 4 pin vga connector for our graphics card my motherboard needs 24 pin power connector on the right side here and Powering the CPU is an 8 pin connector at the top left side of the motherboard And lastly is gonna be powering that SSD and it's pretty much the same as the SATA cable just longer Once you plug in the hardware to the power supply It's time to secure in place this case is bottom mounted although some budget cases are top mounted for the PSU. You just slide it into place under the shroud here and usually included screws some cases to even have a bracket But once it is screw it into place using included power adapter to get it up and running Now we're pretty much done so grab your monitor mouse and keyboard Turn it on and if after a few seconds it boots up to the BIOS screen that means you successfully follow this guide good job Last thing and this is optional, but definitely recommended cable management while all those connectors on the back may be messy It's in your best interest to bundle up as many of these as possible so it's much more organized that way I'll make putting on the back panel much easier without potentially damaging anything if you ever need to change or swap out components having everything Organized will make that much easier to find what you need your case probably has loops in the frame to zip-tie or use cable ties So that's helpful once.
That's done put back on your side panels screw them back into place, and you're good to go Alright, so as you can see with this crazy cool RGB build from Corsair We have going on here using that nice tempered glass crystal case with the RGB Ram and there ll series RGB fans This PC is not only looking crazy cool, but it's done. It's up and running and that's how you build a gaming, PC. This build guide has brought to you by Corsair And the new Corsair hydro pro liquid coolers these a iOS are meant to be seen not her With flashy RGB dynamic zone lighting that would have been perfect for this video combined with magnetic levitation fans and precise pump control You'll have your pcs staying cool while keeping whisper silent for both AMD and Intel CPUs the new hydro pro coolers have modular and tool free mounting brackets for easy installation you can also pick these up in two options 280 millimeters with the H 115 I Pro and 360 millimeters with the H 150 I Pro check the links down below to learn more so if you follow this guide Step-by-step when your PCs good to go Congratulations. You can get the gaming now But remember like I said it depending on whether you're building an AMD or an Intel build Some of the mounting steps will vary for the CPU as well as the cooler Just check your manuals for that if you have any questions giving questions that you just have in general about building a PC let me Know in the comment section down below and don't forget You're solving a hardware that you like check the links in the description down below as well on everything listed down there for you So I hope this video helped you out if it did and you enjoyed it.
Give it a big thumbs up and show your support Feel free to follow me on Twitter at random Frank P and last if you haven't already hit that subscribe button Well, I'm random Frank P. Hope you enjoy your new gaming, PC. Have a good day Oh.
- Hey guys, this is Austin. I might be slightly sick
but what's also sick is the PC that we're about to build. Yes my friends, it's 2018,
which means it is time for an all new gaming PC build tutorial. So as you guys will probably be aware, building a gaming PC
is not that difficult.
I like to compare it to
something like doing adult legos. Now I will be giving a full tutorial on the Photon 4.0 Today, so if you guys want information about the actual parts that I'm using,
as well as the performance, you guys can go check out that video. The idea here is that pretty much anyone with an afternoon can
build yourself a computer. Before we get started, let
me give you a quick tour of the parts that we're going
to be using for the build.
So any computer is going
to need a processor, in this case a Ryzen 5 2400G. Now what's cool about this, is that not only does
it handle the processor, but this also has
integrated graphics inside. So even though I will be showing you what it's like to install a graphics card, with this build you
don't actually need one. Next we have the motherboard.
So the idea here is that you
put the processor in here, the memory in here, you connect the SSD, pretty much everything in the build will connect with this in some way. Next we have RAM, so you can think of this as the short term memory of your computer. Every time you open up an
application, it lives in this. This build is also using an SSD.
So this is basically the
same thing as a hard drive, it's where you store files and programs and all that kind of stuff. The difference is is that SSDs, while a bit more expensive,
are much, much faster. And this one specifically is
in the smaller M2 form factor. Like I said earlier, this build doesn't actually need a graphics card, but especially if you're
building a higher end gaming PC.
Or you're doing anything that's really heavily reliant on 3D applications, having a graphics card is
going to be a big help. The literal heart of any
computer is the power supply. So this is what takes
the power from the wall and provides it to all of the different components inside your system. Last but not least, we have the case.
Now cases are actually pretty
much dependent on your style, so every computer will need
a certain size of a case depending on how many hard
drives you're putting in, what size motherboard, but a lot of this does come down to your personal preference and with this one, we're
going a little bit stylized. Now anytime you're building a computer, you do need to come prepared
with a wide variety of tools depending on what
situation comes up, or not. Actually, the only thing you really need is a Phillips screwdriver. I'm not kidding, you can
build an entire computer with just a single screwdriver.
So now that we've got all
that stuff out of the way, the last thing to do
is find your workspace. So generally speaking I like
to find a decently sized table, you're gonna have parts and cables and stuff kind of all strewn out. And make sure that you don't build on carpet if you can avoid it, static electricity is the enemy of a computer part, believe me. Hey whoa, whoa, don't show
that, don't show that, Ken.
I'm an expert, it's fine. Just you at home, don't build on carpet, unless you're an expert
or Ken sells you out. The first step is to get
the case out of the box. Now even though we're actually not going to be putting everything
inside the case as we go, that'll happen a little bit later, I still like getting the case out of the box and ready to go.
So this is a little
bit of an unusual case, it is the Thermaltake Core P1. The idea is that because it has a giant tempered glass window, we're actually using it
to show off the build. I will say that this might not be the most beginner friendly
case in the world, considering that we actually
have to put the case together, and usually it just comes
fully assembled out of a box. But let's see how it actually is to build.
(Upbeat music) One quick case change later,
we have the BitFenix Phenom, a case that thankfully does not require 17 steps to put it together. So we're going to be using
this for the tutorial, even though the main build
I will eventually have to rebuild into the other case. But especially just because I've got to actually show you guys how to do it, things are going to be much,
much more common in this case, versus the other one, where
you're going to be doing a lot of weird mounting and whatnot. This is just going to make
everything a lot easier.
The first step is to remove the four thumbscrews on
the back of the case, which will allow us to remove both the left as well as the right side panels. Now we mostly need to do
this to actually be able to get a little more access to the case. But with that open, we can
see that there's actually a fair bit of room inside this. Generally speaking, bigger
cases are easier to work on and as you get smaller
and more sort of custom, it gets a little bit more challenging.
But the good thing is,
pretty much all of them do have a very similar layouts. Usually you'll find a
box full of hardware, so we can open this guy up later, but should have some
screws and some random bits and pieces that we'll need
a little bit later on. If you come around back, we'll see where the power
supply is installed. Now cases will put this
in different locations, sometimes it's gonna be up top, but with this one it's
going to be in the bottom.
All we need to do here, is just
remove the four thumbscrews that keep this little bracket in place. So, going back to my analogy about this being the heart of the system, it really does sort of provide power to basically all of our components. Now power supplies will
come in different sizes, they will be more or less powerful, but at the end of the
day, they are very simple. There are two major
types of power supplies, modular and non-modular.
So this is a standard non-modular supply, which means that all of our cables that we're going to
need come pre-attached. However, higher end power supplies typically do come modular, which will allow you to actually plug in each cable that you want. Basically making it a little
bit cleaner inside your build, so you don't have a bunch of
extra cables hanging around. Before installing this guy,
take note of where the fan is.
So depending on your case,
this will either be facing up or it will be facing down. So with this guy, it's
going to be facing down because we have this little mesh here. The important thing is, always make sure there's some ventilation. You can't put this sort of
like face down on like a table or face down on like
a flat piece of metal, otherwise it will overheat
and bad things will happen.
Inside the power supply box,
you should find four screws. Now this is how we're going to mount the power supply to the bracket, which will then go attach to the chassis. Now not all cases will actually do this, so sometimes you can
completely ignore the bracket and cases will have you mount
this directly onto the case. One thing to keep in mind, is that when you're
tightening things down, start on one corner and then
move to the opposite corner to make sure that you're
applying even pressure.
So I'll do this screw, then
I'll do the one on this corner, and then I'll do the final two. So with the power supply installed, the next step is set
this guy off to the side and grab our motherboard. Like I was saying earlier,
the motherboard is pretty much what everything in the
computer connects to. So there are a few things
that you need to keep in mind, obviously pick a motherboard that is going to be compatible
with your processor, but the size is also important.
So as you guys can see here,
this guy is pretty small, this is what's known as a mini ITX board. Now this happens to be a mini
ITX case, which all works out. You can go with a smaller
motherboard and a bigger case, but obviously not the reverse. So something like a micro ATX
or a full size ATX motherboard would not fit in your case.
So you're going to go
pick one of these out, make sure it supports
the correct processor and make sure that your case will actually be able to fit it. Now anytime you see an exposed
circuit board like this, you wanna be a little bit careful, especially of static electricity. So it comes in this anti-static bag and when you grab it, try not
to grab onto the actual board, so something like one of the
metal pieces should be fine. And once you pull it out,
I like to actually set it on top of the motherboard box.
So even a small motherboard like this is going to have a ton of
different sockets and cables and connectors all over the place, but you only need to pay
attention to a few of them that you're actually going
to use in the system. So one of the most important things is where you install your processor. So Intel and AMD do this
slightly differently but it's pretty much always going to be a gray socket in the middle. The next thing you'll
find are your DIMM slots.
So every motherboard is going to be a little bit different here, this board has two, however
some have four, or even eight. This is where you're going
to install your memory and the only thing to
really watch out for here is to make sure that you
do have the correct RAM. So this, like most modern motherboards, are going to support DDR4. However, older systems will
use something called DDR3 or even all the way back to DDR2.
It's all very similar to install, just make sure you get the right kind. Below the processor is going
to be your PCI Express slot. So since this is such a small motherboard, we only have the one. However, a lot of motherboard
will have four or even seven.
Now this is going to be where you're going to install various different add-in cards. Typically speaking, it's
going to be a graphics card, but sometimes you might
install an SSD here, maybe like a video card,
maybe an ethernet adapter, I don't know, depends
on what you're doing. But that is going to be where you're going to install a lot of
different add-in cards. Move down to these small
rectangular connectors and this is what is called a SATA port.
Now SATA ports can be used
for a couple different things, typically speaking it's going to be either for an SSD or for a hard drive. But if you're still old school
and rocking an optical drive, that will also plug in to the SATA port. Right beside that is our 20
plus four pin power connector. Now this is what supplies the
main power to the motherboard, as well as a lot of it to the processor, to the graphics, all that kind of stuff.
This is going to be the biggest cable that you're going to plug
in from the power supply and usually it's going to be mounted on one of the sides of
the board for easy access. Now in the top corner here, you're going to find our
four plus four pin CPU power. Now motherboards can be a
little bit different here, some only have four pins,
whereas this one does have eight. It's basically the same thing, because pretty much all power supplies are gonna have a lead that
will either do four or eight, but this is what supplies
power to your processor.
Something a little bit
unusual on this board is where the M2 slot is. So this is where you're going
to install higher end SSDs, like we're using for this build, and typically you're
going to find it somewhere on the actual board itself. However on this guy, it's actually going to be here on the back. Spin the whole thing around, and this is where the rear IO lives.
Now these are all going
to be all the ports that are going to be sticking
out the back of your case. So once you install your IO shield, you're going to pretty much see it's something a little bit like this. Speaking of, now is as good a time as any to actually install this guy. So it's just a little piece of metal.
Now the only thing you need to do is make sure that you're going to be doing it in the correct orientation. So for this guy, we're
going to be putting it in on this side, right? This guy's pretty easy to install, so all you need to do is line it up and press it pretty firmly
until it clicks into place. Now you wanna make sure this
is all the way into place, as if it's slightly not quite correct, what's going to happen is your motherboard is not going to line up correctly and that's just going to be a huge hassle. So if you ever have
any problems with that, just make sure that this guy is fully in.
Also, as we'll talk about in a minute, you see all these little metal pins that are all over the place? Make sure these are pulled back
when you install the board. The next step is to install our processor. So in this case we're going
with the Ryzen 5 2400G, but generally speaking it's
going to be very similar, regardless of whether
you're using AMD or Intel. So like I was saying with the motherboard, you want to be very careful when you're handling stuff like this, and especially so when you're
talking about a processor.
So on the back here, if I open it up, you'll be able to see that there are lots of little tiny gold pins. Do not touch these, if
any of them get bent, you're gonna be in serious trouble. The best way to handle this guy is just to grab it form the
sides and hold it by the edges. Actually installing the CPU
is pretty straightforward.
So if you come down to the socket, what you're going to see is
there's a little metal arm here that's going to be the retention arm. So we pull that back
and all the way forward, we're good to install the processor. Now there's going to
be a little metal notch that's going to be on
every single processor, which will tell you which
side to line it up with. So once you do, just set it
gently down into the socket, pull the arm all the way down,
and that is all ready to go.
The next step is to
install our CPU cooler. Now this is an area where
pretty much every single one is going to mount in a different way. So unfortunately, you will
probably have to dive into your instruction manual to see
exactly how to mount yours. Thankfully though, if you're using a stock Intel or AMD cooler, they're not too difficult to install.
The main thing to keep in mind is that there's going to be
pre-applied thermal paste here. You do not want to touch this, as this is what's going
to make a solid contact between the heat sink and your processor. When it comes to the AM4 socket,
which is what Ryzen uses, you're going to wanna
remove these two brackets that hold the little
plastic pieces into place. And once we undo that, we're
free to install the heat sink.
So there are going to be
four little screws here that you're going to want to line up. And when you do this, make sure that you actually set it down it smoothly. So you basically want
all of that thermal paste to make solid contact with the processor. Don't try to like, you know, put it off to one side or the other, just try to get it down as
smoothly and evenly as possible.
Making sure that all of
your screws are lined up, then you just want to tighten them down. And the main thing here is
just like I was saying earlier, you want to do it in a cross pattern, so tighten that one a little bit, then come to the opposite corner, tighten that one down just a little bit. Come over here, and do this process until you get this guy
all the way locked down. Alright, so with that we should be able to pick up the entire
motherboard by the cooler, and it looks like everything
went in pretty well.
Now the next step is to
actually plug in the fan. So this is going to be
using a four pin fan header. So you'll see that there are going to be two little tiny notches there, basically that just means that you can't plug it in the wrong way. So on this board, we have
our fan header right here, and it's as simple as lining it up and plugging it all the way in.
Next up, it's time to install our memory. So RAM is actually very
straightforward to install, so the only thing you need to do is, like I was saying earlier, make sure that if you're
using a DDR4 system, use DDR4. If you're using DDR3, make
sure that you're using DDR3. The easiest way to make sure that you're using the correct memory, is that there's a little notch that's going to be about
2/3 of the way down.
So on DDR4, that's going to line up with the correct slot on the motherboard. If it doesn't line up,
you're probably using the wrong kind of memory. All you need to do is
line it up, slide it in, and then with equal
pressure on both sides, just press it down
until you get the click. Then we just repeat
that with the other DIMM.
And we're gonna be good to go. And so with that, our motherboard is actually pretty much good to go. So the next step is going to be installing this entire contraption
inside of our case. Depending on your case,
the motherboard is going to be installed in a
couple different ways.
So most of the time, it's going to live in this sort of vertical section here. However with this guy, we're going to place it right down here. So if we dig through the
little box of hardware that comes with our case, we
should see a bag of screws. Now we're going to need four of these to mount the motherboard inside.
Now sometimes the case
will actually require you to install the standoffs. So you can see that these
are already going to be here. If so, make sure that you just screw them all the way into place. With this guy, we just need to drop the motherboard into place, screw it in, and we're going to be good to go.
Because this case is so small, it's actually not that hard to
get the motherboard lined up. So we just need to get it sort of roughly in the right position right here, and then if we move it
around to this side, we're going to make sure
that all these ports are actually going to come
through the IO shield. So this is going to require
a little bit of wiggling to make sure that it's
going to line up correctly. But as long as it's on
all four of the standoffs, which it pretty much is, we're
good to screw it into place.
It's a little hard to see it on camera, but there are four screw holes on each corner of the motherboard that we're going to use
to tighten it into place. Now something that you should
definitely keep in mind is that before you
tighten everything down, make sure that everything
is lined up correctly. Remember that whole thing about make sure that you line up
the motherboard correctly so you don't have to
accidentally undo everything? Well you should also make sure that if there's any weird parts on the bottom of the motherboard, that you have those installed before everything is screwed into place. So normally the next step will be to install a standard SATA SSD, however this time we're
going to go with an M2 drive.
Now especially with this
specific WD Blue drive, there's really no major
difference in performance. The main difference is, this
is a much, much smaller drive, which makes it easier to install, especially because it takes
up less room in your case. Installing the drive is
pretty straightforward, you just need to line it up
with the connectors here, making sure that it rests
all the way in there and then we take that little screw that we pulled out of it and that is going to be
the retention mechanism to make sure that this SSD doesn't go flying out of your system. If you're installing
a standard hard drive, SSD, or optical drive in your system, then it's also pretty simple to install.
So if you look over here, there are going to be two connectors. The smaller one is going to be for data and the bigger one is
going to be for power. So every case will do this
a little bit differently, so you can see they have
these little drive rails that you can install not only a big 3 1/2 inch desktop hard drive in, but also something smaller
like this laptop hard drive. So you're gonna want to mount it to there and then for actual cabling,
it's very straightforward.
So you dig through the mess
of power supply cables, you're going to find this long flat guy. There's a little notch on one end, so it's only going to go in one way. All we need to do is just
connect this to our hard drive. Once that's into place, it
doesn't really click or anything, it just slides right
in, we're going to want to find one of these SATA data cables that come with your motherboard.
Again, this guy's notched, it's
only going to go in one way. And if we line that notch
up, it will click into place, and then you just plug this
in into your motherboard and you have your fully up
and running hard drive or SSD. For this video though, no more of this, we're going with our upside down M2 drive that I totally remembered to install now. Something else that most gaming builds do, although we actually don't
need it for this system, is installing a graphics card.
So this is going to be
pretty straightforward. What we're going to be doing
is using the PC Express slot that's going to be on
the bottom of the board. This one's metal, most
of them are plastic, but it doesn't really make a difference. And then what you wanna do is look around to the back of the case, and this is where we're
going to get our video outs.
So essentially, just like
the IO shield protects all those little ports on the motherboard, this is going to be where you're going to get your video outs, such
as display port and HDMI. So if we remove the thumbscrews, we should get this little
bracket out of the way. We're gonna hold on to that for right now, but what we don't need are these two little metal pieces right here. So this is just a cover
to keep your PCI covers from getting dirty or anything
getting inside your system.
If you're installing a graphics card, you get those out of the way. And now we install the
actual graphics card itself. Ordinarily, when you're
installing a graphics card, you measure to see will it
actually fit in your case or not. With this particular case,
it doesn't quite fit.
Which is fine, because we're not using a graphics card in this system, but if we were, it would
go in, right about here. What this really means is I just need to remove these drives, so it doesn't matter because
we're not using them anyway. But that's going to free up the space to install a graphics card. Which, if we just line
it up with the slot, is going to go in a little
bit something like this.
Now all you do is press it
down until it slams into place, that was a little bit more
violent than I expected. However, that is pretty much all we need to do to get it plugged in, now we actually need
to use the power cables to make sure that it has plenty of juice to run all of the crispy, crispy 4K games that we're going to throw at it. If I wasn't going to take
it out immediately after I show you guys how to do this. Some graphics cards,
especially lower end ones, don't require any additional power, it's gonna pull everything it
needs from the motherboard.
But most higher end ones,
this Radeon Vega 56 included, need a couple of these six
plus two pin connectors. So all you need to do is just line up the connectors and plug them in, and then we're gonna be good
to get this guy up and running. It might look pretty bare bones, that's because it is very,
very simple and clean inside. However, this is all the components that we need to make our system work.
The next step is the fun one, connecting all these
wonderful cables and wires all over the place to get
this guy actually operational. So we actually only need two
sets of cables from our system. So we need the four plus
four CPU power connector, which will go straight
into the motherboard. And we're also going to need
our 20 plus four pin connector, which also will go into the motherboard.
And this is going to be the big fat guy, and usually I like to start
with it because it's sort of the most unwieldy cable
to actually connect. All you need to do is line it up and make sure that it clicks
all the way into place and that's going to be it
for the 20 plus four pin. Now the next step is the CPU power cable, which is also going to be pretty easy, if I can find where it went. This one's going to be hard to see, but all you need to do is line it up with the little four
plus four pin connector on the motherboard corner,
plug it all the way in, and you're gonna be good.
Now it's time to install the fan. So this guy has a fan right back here and it uses a three pin fan header, very similar to what we
used for the CPU cooler. Again, this guy has notches, so it's going to plug in to the fan header on the motherboard only one way. Now for most cases, you're going to find a ton of different front panel connectors dangling somewhere from the front.
However, on the BitFenix case, we actually have all of them
attached to the side panel. Now this makes things a little bit cleaner because you can have
the buttons on the side but it makes it a little bit more annoying when you're building the computer because that way you have to kind of hold the side panel in place while
you run all of your cables. So this might look like a lot but it's actually not too crazy. So the big guy is going
to be our USB 3.0 Header.
So the only thing you have watch out for is that there's a little
notch on this guy, when you plug it in, make
sure it's all the way in. I've definitely pulled these guys out and had this entire
plastic piece come with it. Now beside that, we're going to get all of our front panel connectors, I'll explain how to do these in a second, but essentially that's what
we need this manual for, a lot of little fiddly stuff. And then we have our audio.
So these are going to
be our audio connectors to make sure that the headphone and the microphone jack work up front. This guy is going to be
really straightforward, we're just going to plug it in here. One of the only things
that this case doesn't have is a USB 2.0 Header. So that's going to look very
similar to something like this.
You can tell that how the audio and the USB headers are installed because out of all 10 pins, they're each going to
have one knocked out, so again, you can't
install it the wrong way. Last but not least, you wanna grab all of these little tiny front panel connectors. So this is where it's
going to be very important to take a look at that manual
to figure out the diagram of where each thing gets plugged in, as every motherboard does
it a little bit differently. So something important to note is if you look on the bottom here, there are little tiny arrows that denote the positive versus the negative.
That is very important
as when you go to say, I don't know, plug your power button in, and you put it backwards, you're gonna hit it and
nothing is gonna happen. Just make sure that
all of these connectors are put in the correct way. Now this might not look
like a completed system but before we start doing cable management and close the case up and make sure that
everything is ready to go, first we need to do a
test boot to make sure that we didn't make a horrible, horrible mistake along the way. So once you have your monitor,
mouse, and keyboard ready, all you need to do is hit the power button and hope everything works.
We have fans spinning,
the rear fan is spinning. Now, will we actually get it to post? USB is up, and yes! Alright, so that means
that we've pretty much done everything correctly. The next step is to
actually get in the BIOS. And make sure that all of our memory, SSD, all of that kind of stuff
is showing up correctly.
Alright, and it looks like
everything is showing up. So it shows AMD Ryzen 5 2400G, shows our 16 gigabytes of memory. We also do see that our 500
gigabyte SSD is showing up. So from this point, all that's left to do is to turn off the
computer, unplug everything, and then we just need to do a little bit more cable
management to, you know, make sure that the side
panel will go on the case.
But once we've done that, we have a fully operational computer. Throw a copy of Windows on
this guy, install your drivers, and you're gonna have a
fully operational gaming PC. Now if you guys wanna see
how the Photon 4.0 Performs and what the original case
was supposed to look like, feel free to go check
out the video over here. If you enjoyed, definitely be sure to subscribe to the channel.
Anyway guys, thank you
so much for watching and I'm gonna go get some sleep because I've been working on this computer for a very long time and my voice is pretty
much gone, so, yeah..
Hi this is Phil from Make Tech Easier
and welcome to How to Benchmark your Windows 10 PC. In order to fully
understand your PC's performance you need to understand benchmarking and
benchmarking software. Today we're going to help you do that and hopefully
provide you some great options in the process.
What are benchmarks? In this context a benchmark is a measure of performance,
whether for your entire PC or of individual components. This measure of
performance can be lined up to and compared with other PCs that have taken the
same benchmark, allowing you to see how your performance lines up and compared
to everyone else's.
Is one of your components underperforming in comparison
to what other people are scoring? A. Benchmark may reveal that discrepancy.
Before benchmarking your PC. Before you start benchmarking your PC it's
important to ensure that you have all the other programs closed. Having other
applications open will bog down your results, sometimes significantly,
especially in the case of games and web browsers.
You're also advised to close as
many background applications as you can, but those shouldn't matter too much. How
to Benchmark your PC. As far as the actual benchmarking process itself goes
well that's pretty simple. All you need to do is download, install and run the
benchmarking software, typically with the program's default settings.
In the case of
graphically intensive applications like Unigine Heaven and 3DMark you may feel
encouraged to adjust settings. We really only recommend doing this after you've
first run on default settings and then adjusting settings to see how your PC
can handle different levels of visual fidelity. If you want to learn how
to benchmark your PC the how isn't really the question you should be asking.
The question you should be asking is what software should you use and we'll
provide some recommendations now. Userbenchmark.
Userbenchmark is among
our favorite full PC benchmarking tools for a multitude of reasons. First and
foremost using the application is exceedingly simple. It doesn't need to
be installed and after you launch the application you can benchmark your
entire PC in one click. Once the benchmark finishes you'll see your
results opened in your default web browser in a page like this one.
Geekbench.
Geekbench is another full PC. Benchmarking tool but with a catch;
this one is cross-platform. With the cross platform Geekbench benchmarks you
can do things like compare the performance of your PC to the latest
flagship smartphones. For example we have an i54690 in a PC and a Google Pixel
XL as a smartphone.
The cumulative multi-core performance of the Pixel adds
up to the power of just one of the desktop PC cores, at least on paper. Now
obviously these CPUs won't have much crossover in terms of applications and
usages, however being able to compare their raw performance in any capacity is
in our opinion quite educational. Unigine Heaven. Unigine Heaven isn't the
latest Unigine graphical benchmark but it is our favorite.
There's a few reasons
for this but chief among them is that Unigine Heaven is a great benchmarking
tool for today's mid-range GPUs. The latest graphical benchmarks out there
are designed to bring 1080TIs to their knees but the Unigine Heaven
benchmark is a few generations old and more closely in line with what you may
expect out of modern visuals in today's video games. If you have a newer, higher
end GPU and want to push it to its limits, you're welcome to grab one of Unigine's
newer benchmarks. Otherwise this one should do the job for most people with
mid-range gaming PC's or lower 3DMark.
3DMark is one of the premier
graphical benchmarking solutions on the market right now and like Geekbench
it also supports multi-platform. It supports all kinds of different
platforms and graphic APIs and has a multitude of tests you can run to push
your PC to its limits, even with the free basic addition. While 3dmark does lock
some of its features behind a paywall the basic benchmarks will all be
available to you for free with their basic package.
We highly recommend even the basic package though if you want to see what
your system is capable of. Which benchmarking software is right for you?
Ultimately which benchmarking software you opt for is dependent entirely on your
preferences.
For a basic rundown of what your system is capable of and how it
compares to other systems out there Userbenchmark and Geekbench will more than
do the job. In fact Userbenchmark's database of performance results is very
helpful to us as hardware enthusiasts, especially for say comparing GPUs. Unigine Heaven and 3DMark will have larger file sizes and boast more intensive
graphical benchmarks. Scores for these are also fun to compare but in our
experience are generally less useful than Userbenchmarks and are better for
testing the capabilities of your own system not necessarily how it compares
to others.
Of course you can just download all of these if you want to. Let
us know what you decide to go with. Ok as always thanks for watching and please
subscribe and add your comments below. See you next time!.
[Whapoosh]. Top o' the mornin' to ya, laddies! My name is Jacksepticeye, and welcome back to PC Building Simulator! [Instrumental rock playing]
Check out this rockin' intro! It's awesome, I love it! So I played-- it's very loud... I played a small little demo version of this game a while ago- There was very little computer cases in it, there was almost no components. You only get to build a very small little- tiny piece of what you could for a regular PC, umm so there wasn't that many mechanics in it.
But now, it's- it's a more fully formed game now, and they're actually in conjunction, and in partnership with a lot of actual component makers, and case makers and computer building component companies, -what the fuck am I trying to say? They're in conjunction with a bunch of them, so a lot of the stuff from actual PC building is in this game now- Which I find fascinating, 'cuz I love building PCs, I've built all my own PCs for all the YouTube stuff that I'm doing And I love doing it, it's very very fun to do, and I love getting it all perfect, and neat and tidy, and oh~ so lovely and then hitting the power button, and having it all come on for the first time, It feels awesome-- Not as awesome as this music, though! Uhm- So, I didn't realize there was a career in the game... I was just going to go into free build, I've-- Eventually I want to try and make my actual PC, and go through that and put in all the components that I have actually in this one, because I've been using this one for years on YouTube, and I have a few upgrades here, I just haven't moved on to them yet because I have to move ALL the stuff over- Game save files, I have to move over game install folders, all the software that I use- it's just too much hassle, so I haven't done it yet, but I should because this one's kinda showing it's age by now... Let's just go into career, Then. I don't- I need- I don't need to know how to build a PC.
I know how to build a PC. It's like Lego. "Welcome to PC building simulator. To begin, go to your PC (by the doorway) and open the email program on the desktop- -You've got mail." Ooh Oh nice! Wow! This is fun! Look at this nice place! I live here.
I've- THE GHOST FRIDGE!! GHOST TABLE!!! TWO GHOST TABLES!!! I don't wanna live in this creepy ghost world anymore. Okay, "You've Got Mail!" Dude, this is neat! Umm, "Thanks for taking over the PC shop for me, sorry It's not in a better State." I know- -California, what are we gonna do? "A few things! The company isn't doing very well, and there's no money in the bank account" Aces!! *Chuckle* "The rent and energy bills come out monthly so make sure you have enough money for them." Okay. "I had a job on the go-" Oh!! So I'm building PCs for people, aah "I had a job on the go which should help with the rent (see the email below)." "Remember to use your thermal paste When putting in a CPU. I almost always forget, and the PC's overheat!" Yeah, you put a tiny little piece on top!
"If you think you're all set up.
It's your company now so run it-" Fuck me! Ok. "I Hope you can-" Oh! "Hi Tim" Hi! I'm Tim, apparently, I'll be your- computer maker "Hope you can help me! My computer has been running slower than usual and I think I might have clicked on something - - I Shouldn't have do I have a virus?" Go to PC, O.... ..Kay, What am I doing? Ok.. I am fixing a PC! *Music gets louder and sean starts playing Air guitar* OH! I feel like I'm- I'm in a country-western game! "PC can boot to OS" "Remove viruses" okay, "click to work on this PC" "press P to power" okay.
*Looks at keyboard and button mashes it* It's not plugged in, got it! *Bursts into laughter* "For this job you need to run a virus scan. Press 3 or the cable button and plug the monitor keyboard-" Oh.My.God. You have to do Everything!! Ok, Do I have to grab the cable somewhere? Ok that's the power yeah, this is keyboard and mouse and shit Okay, what do we got? We got USB 3? Oh wait no. You're the- Ah you're just the HDMI, Ok cool.
"Now you need to put your USB Drive into the back of the PC- -So you can install the virus scanner press 1 or the install button." Jeez man, this is fun! Oh.. In we go! Put in my little dongle! "Now press P or the power button to turn the PC on, click on the monitor to use the operating system." The amount of people out there who make money off scanning people's computers... Like people with bad laptops, or bad desktop. Something you just bring it in and they scan it and remove the shit and then give It back to you, and then it's like yes four hundred dollars, please Probably not that much...
But they make so much money off doing that kind of thing, It's so easy! It's so easy to do! Also, Stop clickin' on weird shit! Also get like malware bytes or something. Umm ok, power! She's on!! Default heatsync and everything. All right, do I have to go over to the computer now? Remove the viruses!! Insta- I forget what it told me to do... Ca-Can-Can I -can i- I Don't Need To Remove stuff!! Oh, I can just go over here, and click on that.
All right! Got it! "Install the virus scanner welcome to Omega OS click add/remove programs to install the virus" D'aaaahhh Lighting, Virus scan! This is fun! *Chuckle* I want to do this as my job! I love PC's! I love electronics! I love getting my-my teeth into like.... Fixing shit like this. There's so many times when parts of my PC have broken or- Stuff has not worked, or clashed, or collide, or something. And I'm like, Okay, how'd we figure this out? How do we get into you? "You must restart your PC restart now?" Yeah,baby! Are-Are we-Are we good? Did you do it? "Start scanning" ah..
Files Infected! Four Hundred!?!? Get off pornhub!! Even though, pornhub wouldn't have viruses on it. Umm, It's all the weird, crazy, websites that no one knows, about that has all the weird shit on it. Ummm!! I've heard.... "You've removed all the viruses and the PC is ready to be returned to the client, pick the PC back up with the right mice button." Hey, that's fucking words..
Okay, just unplug all the shit.. "Collect your reward, Great! Now you just need to collect your pay, go to your email and hit collect." Ah the future!! Umm...Ahh I got $100 for that All i did was plug shit in, scanned for a virus, removed 400 files, and I got $100 for that! You must be paying me for my time! "Hi there i just wanna say. Thank you for fixing My PC. It's booting Faster than it has in years!" Yeah, cuz they just have a shit ton of nonsense on it anymore! "I didn't realize your uncle- -had gone away looks like the business is in good hands, though" Yeah, he left.
*In a whiny voice* He left the whole business to me! I don't know what im doin'!!! * In a normal voice*so this guy needs.. "Hi my graphics card has fried itself and i need- it needs to be replaced the with the same one please-" Didn't know Jamiroquai did the soundtrack for this game? "-An NVIDIA GTX 970 maybe one of those 'Sean' ones?" HOW DID THEY KNOW MY NAME?!?!? 970, So you wanted one of these ones? I'm just gonna get you a base one. I don't know if you have an ATX or a micro ATX Motherboard.. Cool, "Use the delivery options to choose way when best to receive your components.
Often it's better to pay for faster delivery than- -Wait days to receive things" Okay? Oh, buy now, okay. Umm... "Three to five. Working days delivery, Same day delivery"
A HUNDRED DOLLARS!?!? "Next day delivery" please, hundred dollars same-day delivery.
What do you think I do? Remove viruses for a living? Christ! I'm going to the door-I'm going to the door. I need to advance the day! I've left the workshop! I don't care anymore! Ooh. Oh, yeah!! Baby. Okay, fix, scan, Upgrade! This is the one that we were just doing, I'm gonna continue with this one! As I bust out to these sick jams!! Hahahah That's not the fucking one that I need! Alright, let's open this bad boy up, let's remove the side panel!! Okay, Jesus man....
*Chuckle* I have to do every little thing!!! I mean it's pretty cool. I like it. It's fun. It's therapeutic when you're making your own computers! Like actually sitting down.
Unscrewing everything just turning off your brain, putting all the components in, making sure it's all nice, neat and tidy. You kind of have to be a little- You have to be a little rough with it sometimes, you have to be a little aggressive with the PC.. Because sometimes you have to click things in, and sometimes you have to push.. Like the CPU stuff down, and you're afraid, It's gonna bend your pins and all that kind of stuff.
It's not gonna happen unless you're a fucking moron!! It might happen to some people, never happened to me though cuz, I'm a-I'm a genius! Okay, we'll install you, do you actually have different busses? Do you have different PCI slots? Cuz I don't want to put you in an X8 slot if you're going to be putting into an X-an X16 slot Okay, you know wut I mean? You know I'm saying? Umm Oh, And you can filter it by stuff that only fits this PC! Nice! Okay, I need PC parts! And I need the side panel to go back on... There we go! It's just simple! But that's really all it is! Installing a new GPU, and the best part about installing a new GPU is that, you don't have to mess with OS stuff Because it's solving a new GPU is just take out the old one put the new one in plug in your displays And you're good to go for the most part unless your computer decides to be an asshole which Sometimes does, but that's all it is that's all putting a huge amount more horsepower into your PC. That's all it takes Can I not click on you guys? Ok but um Yeah, cuz if you replace your your CPU your CPU is basically your brain whereas your GPU is the muscles think of it that way The very poor analogy but When you replace the brain then it takes a lot more It's a lot more finicky to train like upgrading your CPU is not as easy as upgrading your GPU less put it that way Sometimes it's actually a pain in the ass It's really not that hard, but just that you have to put a whole bunch more shit into it And I don't like it. Okay.
Let's go back over here boot to OS. Works flawlessly Insert USB Drive, and PC to continue, am I done? "Leave by the door". I am done! Okay Shhhhsdskdjf plug out all the shit Nice nice nice nice nice nice nice tight tight tight tight tight tight tight tight I'm actually gonna put you down here there we go This is just a quick scan Oh God Did a family of rabbits live inside this PC? Ewww!! "PC can boot to OS remove viruses clean out dust" this is an all-day job Mother of God compressed air no. I don't wanna be using compressed air okay That'd do it okay.
Oh nice I. Don't use compressed air because I used to use them a lot And then it was just like buy can, after can, after can, which is fine but I ended up buying a it's a it's an electric motorized one that blows air never use a vacuum on your PC by the way ever or Like consoles and stuff console - okay cuz they're usually shielded on the outside for cases But do not stick a vacuum cleaner or a Hoover inside your freaking, PC. Because all that's gonna end up doing is that you create static and you wanna fry your components don't do it It's a bad idea so I got An electric air blower an anti-static one that just blows air all over the place And it's fantastic it really it made it made Cleaning my PC just so effortless ah, there we go looks like brand-new again I Love it! I love it It's rotten!!! Alright, I need to put my USB Drive in the back again install my portfolio of Japanese art let's install a Virus scanner what why our scanner do we have them you also got to be careful about those because some of them are fucking Viruses on their own like what was the one I was using before avast Avast is horrible avast is impossible to remove from your PC not impossible. It's just a pain in my ass 397 files well, I can't remember your name, last time you still win for all the porn.
That was on your computer Are we good? "Leave by the door" hell. Yeah! I love this! This is fun. It's so therapeutic Frick, I need about 500 gigabyte hard drive more Tony easy store It's $50. You're going in my cart, same-day delivery a hundred dollars, okay We're going to incur the cost We're going to incur the cost just to get it right now.
Just so I can do it Okay, cool. Wouldn't that be horrible if I got the wrong one That better not be the wrong one. I swear to God what the fuck Okay, storage put that one in there. Do I have to remove this as well I? I mean that makes sense i dont wanna break the game, but whatever man Nice! Okay, I'm assuming I have to wire you up where's that- Where the hell are the cables for it oh oh that's easy So you need to connect, okay a lot of people who build pcs already are gonna know exactly What's going on But you need to connect the the SATA cable the SATA cable which handles all the bandwidth And then you need to install a like a ribbon cable, or I don't know I don't think hard drives have actually updated a lot Or ever they all use the same power supply, but you install that in the back For the power right okay We need to install back on the PC part site panel you go on here and it boots to OS look at that And leave by the door you betcha Okay, am I good to go? Oh I guess I could have completed the orders here Wow yeah that was worth it that was well worth it The hundred dollars that I used to pay for my shipping.
I just got it back right here now 595 Nice Leveled up! " Congratulation, you've reached level 2 you've unlocked CRYORIG case fans" never heard of CRYORIG. Oh, I unlocked a bunch of i3 and i5 and i7 I. Don't know what I have in my- in in this one. It's an IE.
It's a it's a 4770k. I think it's been ages since I put it in And I think in that one over there. It's an i7 6700 K and then in the other PC that I have yes, I have a lot of computers I like computers It's a risin I'm not familiar with risin's naming scheme very high in risin. It's a 16 core processor Which is a fucking beast! It r- This PC right now the one that I'm using to record this the one that I used for almost everything to edit an hour-long video it takes about 40 minutes to an hour to render that video because this PC is so bloated by now it has everything on it This other one takes an hour to do this one takes 15 minutes to do it on this other one.
It's so fucking fast It's scary, but I've had issues with it so Upgrade to 16 gigabytes of RAM. Okay Remove viruses, okay? And Replace air cooler clean out dust okay? So I need 16 gigs of RAM two of these is also gonna cost less than four of those I really hope that you do not fuck me up by being an XL I mean you need to replace air cooler But you didn't Is it the one on the CPU or just the case fans? I guess these yeah, okay? It's all in here Because if I'm going with the if I'm going with the heatsink on the the CPU. I'm gonna have to figure out. What kind of? Socket you have Because these are like these are AMD and these are Intel okay, you want the cheapest fans, so I guess these they're $10 I.
I don't know how many you need so I'm just gonna get three Buchert next stage delivery Bijizdang, is that everybody? Remove virus okay on to the next day of work. Oh Ding ding ding we have a winner 404 files need to be cleaned oof that's rough, buddy That's a lot of viruses on there Well might not be viruses. It might just be a whole bunch of cookies and shit that I found So this is the this is the RAM one. This is the make or break? Oh nice case! Very nice are you are you 12 and live with your parents? Sick dude alright, we're gonna remove this side panel.
Oh, and I didn't even have to unscrew anything Okay, I don't need to remove the motherboard. I just need to remove the RAM stick. Oh my god. You actually have to do everything It's so weird cuz it in real life, it's all like obviously it's very intuitive.
You just go in you're like Oh, just click like whatever but in this and you like you forget because it's a game you just click on shit, but you actually have to do everything I. Think that's awesome This is by the way this game is Very very accurate to how it is to actually build a PC and one of the reviews I saw on Steam for this game Was really cool because they said they had a computer that their friend built Computer started to mess up on them and because they didn't build it They didn't know anything about building computers they decided not to touch it because they thought they'd break it even further so what they did Was they got this game put all the stuff from the actual computer they had into the game and then they were able to fiddle around all they wanted in the game to try and figure out the Problem and then they learned they learned stuff on how to build computers in real life by playing this game This is awesome. This isn't just a game. This is an actual like Testing tool to see how things look and work and how stuff fits in It's amazing Ok install we are going to memory Alright Do you have colored Channels? No cuz, normally what it is is that well most modern Motherboards you can just put them all in anywhere you want But they have color channels to make sure it's so it's like blue green blue green So you put the in the blues first and then the Greens I dont know if it's- it's been a while since I built my last PC.
Why can't I put you in oh I actually have to open up the clip really hahaha It's weird, but also completely accurate. No close the clip, here we go. Cuz you push it in the clips closed on their own Okay, let's install back on the side panel. She works! Not a bother, even though You could still run into RAM issues later on it cuz it could have still messed up your PC.
Not likely cuz I know what I'm doing okay? More cleaning dust it's so gross What am I wait why am I cleaning that why am I cleaned that glass cuz I know what I'm doing there we go I'm installing the fan, just like they asked, but you didn't even have a fan on the front You just had a dust filter Where was the suction coming from? You need to create a stream from front to back Madness absolute madness You know what I'm installing 2, just so you can have air flow all right. Do you seriously not have power for another fan? Really Son of a bitch! It says broken parts You did mean the CPU!! No!! That means I'm gonna have to pay extra to ship one out now. God damn it. I knew it I fucking knew it M9a or M9i Oh balls, I don't know what socket you have More Tony thermal 100 oh no no no I dont want 2, no no Pay hundred dollars anyway for same-day delivery because I'm stupid Ok thermal paste there you go a pea-sized amount.
That's all you need oh Wait I didn't go collect it. I was like it's broken. How does it arrive broken? Cause it's here My bad! There we go air cooler done. Well.
You know what just for that Audrey anyway I'm putting in a case fan in the front ok It'll keep everything running nice and cool your stuff is getting clogged up and blocked and overheating anyway So it still got clogged and blocked if you don't clean it But at least now you know you- you'll at least have cool parts Not only temperature-wise, but just really dope shit. Boom I'm the fucking wizard. I'm a what? Fucking wizard time to collect my monays 320 200 270 Sick missing thermal paste oh Right that's the next one. I was like I did not forget thermal paste.
I put it in specifically Alright, let's see what happens run 3d America ok no problem Replace motherboard. I'm just gonna get you the one for $100 I should figure out what the next thing is install Sheen power king is 600 or better Well all we have is the 600 so you're gonna have to deal with that Boom your order will arrive tomorrow Nice good night everybody That's a day of PC building in the bag ok well that does it for this video on PC building simulator I could honestly spend hours in this game. I could spend hours Just diddling with computers all day because it's fun and I feel like like, like Because I know what I'm doing I feel like I'm putting some real work in But it's always a case of people being like well you put your own PC together. That's crazy.
I'm like yes Yes, it is. I'm a genius It's really not that hard at all and I'd highly advise anybody who has any interest in making their own computer to just Go for it the first place to start is with a game like this or you can just look up tutorials on YouTube That's what I did when I wanted to start building computers and normally when you build computers you get warranties Well a good pre-built one. You'll get all the warranties and stuff anyway well, hopefully But if you build your own PC you get all the warranties for all the individual parts if something goes wrong Because you put it together yourself You usually have an understanding of how the computer works, and what does what so something breaks? You usually know how to fix it because you've put it together yourself Unless you're just following piece by piece exactly on a tutorial, but I just love this stuff I - I Always love this stuff and when I was looking up the videos and how to do it and trying to figure out how to do It myself and I got my own PC parts I was just in enthralled by it and I just wanted to learn more so I sat down for ages and Just studied how computers work and how different stuff interacts with each other and it was super fun And I wanna build another computer now, but I can't because I don't need one and I don't have space for wine but IF I DO. I'm gonna I might play more of this though and again I want to build my one I want to see if I if my one is actually in the game Can I go back to a save game? Save game can I go back to main menu pre-built? I just want to see if the case that I have is in the game how our on computer to interact Oh my god You know whatever I come back to it again its corsair terabyte err 540 and I love it cuz it's a cube and in one side of the case is all the electronics all the Components and all the stuff that needs air cooling and then in another chunk about this size is Where you put all the cables and the power supply and all the like hard drives and stuff go there so anything that doesn't need Air cooling goes in the back, and I think that does need air cooling goes out in the front And it's super sleek because none of the cables get in the way, and it's all airflow all the time It's amazing even though I have a liquid-cooled, PC here as well Those are a different piece and those are much much harder, and I've never put in liquid cooling myself That actually looks exactly like my the one I'm talking about this is what I'm talking about this section right here is where the electronics going in that sections where the the cables go It's lovely anyway.
Thank you guys so much for watching this episode if you liked it punch that like button in the face LLIKE A BOSS!! And high-fives all-round *WHAPPUSHH* *WHAPPUSH* And thank-you guys and i will see all you dudes IN THE NEXT VIDEO!! Still lovin' the music, rocking out all day.
Hey, how's it going? Dave 2D here. So Xiaomi recently announced their Mi gaming laptop and it's a product I think a lot of people would be interested in because Xiaomi makes some really good stuff for a pretty good price. This is their Mi Notebook Pro. I've done a review of it.
Really heavy hitter for it's price point We've seen the Mi Notebook Air also a really good product for the price point. So on paper it would seem like the Mi Gaming Laptop would be like hey, you know, that sounds pretty cool. So looking at the paper specs and the photos from the press release, they're pretty impressive. One of the things they do really well is build quality.
I think that's like probably their biggest strength when it comes to what you'd expect at that price. Like, very few laptops at that price point are gonna look like this. This is one of the best built gaming laptops you're gonna see at that price point. And looking at the Mi Notebook Pro, it's just a really well machined laptop.
Really clean edges. The occasional sharp edge here and there, like on the bottom they didn't do the best job with the machining but it's a really well built laptop. So I expect the Mi Gaming Laptop to be similar. Their design is quite unique.
The hinge looks a lot like that piston hinge we've seen on the HP Spectre and I used to have concerns about that hinge design but it's actually really good. The design of this whole Mi Gaming Laptop looks quite simple. It's this muted look. Grey slab.
No red accents. No logos. The only Xiaomi branding is at the bottom of the screen. Kinda like the Notebook Pro.
And it's a good look. It's actually one of the least gamer-looking laptops I've seen, which I like. The bottom of that laptop seems to have some kind of RGB lighting for some underglow but aside from that it's nothing crazy on the exterior. The screen on the Mi Gaming Laptop is supposed to have a 72% NTSC rating, which is actually the exact same rating as the one on the Mi Notebook Pro and it might be the same screen, it might not I kinda hope it isn't because this screen wasn't -- I mean it's not terrible but it's not [a] great gaming laptop screen so hopefully they changed it up a little bit but the Mi Gaming Laptop was supposed to take a lot of build and design cues from the Mi Notebook Pro which is actually a good thing, this thing had great Dolby Atmos speakers and I think the gaming laptop will as well.
It's gonna have that good keyboard layout, but this time with RGB and macro keys, and it's going to be running a Windows Precision trackpad, which is always good to see on any kind of laptop. The ports look pretty good. Xiaomi does ports well - they kinda stick a whole bunch of ports into most of their laptops and for the most part, people are happy, they don't care too much about the whole minimalism and stuff like that. Performance - they're running an i5 that's comboed with a GTX 1050 Ti Or the i7 with the GTX 1060.
Now that's obviously going to affect the price, but the thing that's kind of extra cool is the cooling. So, Xiaomi's saying it's going to be the coolest, high-performance laptop on the market. And honestly, I believe them because look at this thing, this was the Notebook Pro and Despite this thing only having an MX150, they've designed it well so you can crank the voltage up really easily. Now, that thermal performance comes at a cost, and that is weight.
So if you look at the paper specs and you kinda don't look at the height, it's actually heavier than I thought it would be and I think a lot of that weight comes from that thermal solution because they're running five heatpipes and those things are not light. Ok, the last thing I want to talk about is pricing. And this is kind of the most important part of this video. Xiaomi products tend to kind of capture the interest of people in North America and Europe because they tend to be cheaper than their counterparts and I was surprised at how expensive the Mi Gaming Laptop is, if you look at the pricing of - I guess similarly designed products, so relatively thinner and lighter gaming laptops that are well built.
The Xiaomi Mi Gaming Laptop doesn't stick out as being an amazing value because the gaming laptop market, especially in that GTX 1050 Ti or GTX 1060 segment. That's a very, very competitive segment. Like you're seeing like twenty, thirty laptops in that kind of - performance range so pricing ranging from $800 to I don't know, $2000 at the top end, so this Xiaomi product it's not super cheap - it's not that it's like expensive or anything, but you always take a risk when you're buying a product like this - at least right now - the brand isn't represented well in North America or Europe, you kind of have to be in Asia to obtain this thing, so there's a bit of a risk when it comes to buying something like this. And it's just that I don't feel like for most people that live outside of the Asian market - I don't think it's worth it to really purchase this, this Xiaomi Gaming Laptop.
It kind of took me for a surprise. I expect it to be cheaper. I'm sure it's a great product, and you're getting really, really good build quality with cool underglow and some really great thermal performance, but when you kind of look at the grand picture, and you see the other options that are available, it's not that it's a bad product, it's just not nearly as compelling of a purchase as other Xiaomi products have been where the price is just like, "Wow! That's so much cheaper!" This gaming laptop from Xiaomi, I'm lukewarm about it, so I'll probably do a review when that thing comes in, but - I don't think anyone should be preordering that thing and be like, "Oh this is like the best value," because quite frankly, I don't think it is. Ok, hopefully you guys enjoyed this video, thumbs if you liked it, subs if you loved it.
This is a $20 laptop. It was a thrift store find, and I got a little
bit lucky in finding not just an IBM ThinkPad, which are bulletproof machines, but even the
same model that I briefly owned back in the late 90s a 600X. I jumped on it, despite initially having no
idea what I could realistically use it for. Join me as I find out whether 20-year-old
hardware can still serve a purpose today.
It turned out to be a little worse for wear
than I initially thought. But I knew I wanted to nurse it back to health,
because giving old machines of all kinds a new lease on life is just something that gives
me satisfaction. Id find a use for it later. Back in 1998 computers were running,
well, Windows 98.
And this computer rocks a Pentium III 450
with a fully upgraded 576MB of RAM, so Im not even going to be upgrading to XP. At least Windows 98 runs surprisingly smoothly
in fact, it feels about as snappy as a modern PC running Windows 10. There were a couple of things I knew I had
to do before I could dive in and try to figure out a new purpose for this thing. The absolute first thing was to make a drive
image using Macrium Reflect.
Im sure there are other good drive cloners
out there, but they all seem tailored to a slightly different purpose, and Reflect works
really well for just quickly backing up and restoring entire drives, and keeping multiple
images handy. This is a free download and its a really
useful utility with a 4GB drive like the one this laptop came with, its easy to
store a bunch of images on your main computer as you do other maintenance, just in case
you mess something up and need to restore one. The second mandatory task was a virus and
malware scan, and I discovered that this laptop had an even bigger infestation of unwanted
pests than my first Manhattan apartment. I have no idea what the previous owner had
been doing on this computer, but he had clearly just abandoned it along with all the software
and files he had on it because the viral infection had gotten so bad that it was affecting functionality.
Even right-clicking no longer worked, and
trying to do things like defragging crashed the computer. I did the virus scan while the drive was still
hooked up to my modern computer for backup much easier that way and I did the
image first just in case my virus scanner nuked any system files while cleaning. I did have to try a few different scanners
before I found one that could cure my particular viruses without killing the patient. I didnt get a disc copy of Windows along
with the computer, so I had to keep the one I already had on the hard drive.
And I wanted to keep all the ThinkPad tools
that it came installed with too. The laptop also needed a few hardware fixes. The battery it came with was completely dead
and this can be difficult depending on the model, but I managed to find a reconditioned
one for $15. As far as I can tell, it works just as well
as a new one.
And I ended up spending 8 bucks on Ebay buying
a used 40GB hard drive to replace the one that came with the laptop, mostly because
the noise old IBM Travelstar drives make sounds like somebody spinning a bunch of roulette
marbles around the inside of a teacup. It doesnt install confidence in the drive,
and its also just incredibly annoying. So all told, I really spent about $43 to get
the hardware fully restored, and upgraded. I finally fired it up and...
I was back into the computing delights that
only Windows 98 can provide. Several defrag runs and some Windows patch
installations later and I had a lean, mean and clean machine that was ready for anything
I wanted to throw at it. The question was, now what? It was both enjoyable and satisfying just
getting this ThinkPad back in working order, but I wanted to really do something with it. I found several sites that list various tasks
you can use older laptops for, but most of them are either best suited for systems that
arent quite this vintage and can at least run a modern version of Windows, or theyre
just not things Id ever use a computer for to begin with.
Stuff like acting as a wifi repeater I
mean, Id rather buy a cheap router for that than leave a computer dedicated to it
24/7. It dawned on me that I have literally several
binders full of old CD games, and as luck would have it, my 600X, despite its age, has
a DVD drive. These computers came with their own version
of IBMs Ultrabay, meaning they could be configured with different drives and end-users
could even swap them out. Most of these shipped with floppy drives,
but mine has a DVD drive and its probably one of the first laptops of any kind that
did.
Now, an important digression here. The PC and Windows standards are known for
backward compatibility, but this isnt totally reliable in fact theres one huge caveat. Back when Microsoft introduced Windows 7 64
bit, they completely broke compatibility with 16 bit applications they just intentionally
stripped that subsystem from Windows. Nowadays most people are running 64 bit Windows
of some kind, leaving no real path for 16 bit applications or games.
This can be a kick to the gut the first time
youre feeling nostalgic for a game of SimTower or Close Combat and get absolutely shut down
by Windows. There are ways around this, most of which
involve running either a virtual machine and an entirely separate 32 bit copy of Windows,
or DOSBox. I dont begrudge anyone that wants to do
this its kind of a pain in the butt, but it does mean you can just use a single
modern PC for everything. I ran a virtual machine back when I was testing
Windows 8 on my Windows 7 computer, and Ive tried out DOSbox for some of my older DOS
games.
But virtual machines require a lot of system
resources and can be difficult to set up, plus you need another copy of Windows. DOSbox is an emulator, and like all emulators
it has its problems. Not all games may run faithfully, or at all,
or they may run with technical issues. Also, as its name implies DOSbox is a DOS
emulator; if you want to run Windows games, you again need to run Windows on top of it,
and install all the drivers manually.
Im not slagging off DOSbox here, but its
just always better to run games on real metal if you can. So if you haven't guessed yet, thats one new purpose for this laptop: old games. Its the right CPU speed and its got
the right operating system. An older computer can be as good as any vintage
game console for playing games there are actually a lot more older games for PC than
any game system, and many of them will really only work on older hardware.
That said, setting this up has reminded me
of how painful the transition from DOS to Windows was back in the 90s. Laptops especially often use non-standard
or at least uncommon hardware, and by the Windows 98 days, they often only shipped with
Windows drivers perfect for those 16 bit Windows games, but to run DOS games youre
going to need to find and install DOS drivers specific to your hardware, and then manually
edit your autoexec.Bat and config.Sys files (remember those?) Ive been having a lot of trouble with my
sound card drivers, which dont seem to exist for DOS, although oddly I can get MIDI
music to play but not sound effects. If anyone knows where I can get some DOS drivers
for a Crystal Soundfusion PCI card, let me know. But, you might be thinking is there anything
just a little more current that you can do on an old machine than run 20 year old games? Well, yes, to a point you can install
desktop Linux on it.
Now, most Linux distributions have advanced
to the point that theyre not going to run any better on old hardware than Windows 10
would, but a few are geared towards low-spec hardware. I had to try a few different ones before settling
on Point Linux, which runs pretty well out of the box on this machine and maybe ironically
for me, at least, actually has better driver support than Windows 98. I guess it shouldnt be too surprising now,
but the last time I installed desktop Linux I could not get half of my hardware working
at all this time I even got wifi straight away, which has been a hellish and so far
unsuccessful experience in Windows 98 because of a lack of WPA support. But old hardware is still old hardware dont
expect to even be browsing a lot of modern web sites once you get Linux installed.
Heres YouTube running on a 20 year old
laptop amazing that it even works at all, but its not really what Id call useable. A lot of modern Linux apps also just wont
work at all for example, the Steam Linux client requires a 1ghz CPU and from what I
gather some sort of 3D graphics card with Linux drivers installed. But even the Opera and Chromium browsers both
require the SSE2 instruction set, which the Pentium III lacks. You could go just a little bit later than
this laptop and opt for a Pentium 4, though youll definitely pay more than $20 in that
case.
Still, with wifi working on Linux, Im able
to download any game patches I may need through regular old Firefox which thankfully does
work - and then install them on Windows. Its a little bit annoying switching back
and forth between operating systems, but I. Dont do it that often. Of course with Linux you can teach yourself
programming, you can run a home media or file server, you can teach yourself Linux, or all sorts of other things.
Its a modern OS but one with its roots
in Unix, so you can both learn a lot of things by using it and do a lot of fun things with
it. Youre still going to be pretty limited
by the lack of horsepower in an old machine, and even just navigating around the operating
system involves an annoying delay every single time I click on something, but unlike modern
versions of Windows, you can scale back Linux as far as you want to get it to run decently
on any hardware. So you might end up finding yourself wanting
to install it on a different machine too, but its still helpful to have it on an
old laptop since it acts as a bridge between older, DOS-based flavors of Windows, and the
present day. Now, lets say you want go to out and buy
your own old laptop to try some of this stuff out on there are a few things Id look
for.
First, seriously, buy a ThinkPad if you can
theyre user-serviceable, theyre extremely durable, and theyre everywhere
meaning parts are everywhere too. Theyre also really cheap, obviously, so
a great value. If you cant buy a ThinkPad, try to stick
with one of the big-name, popular brands just to make it easier to get parts. Second, it is very handy to have at *least*
a CD drive, if not a DVD drive.
A DVD drive is recommended because its
just easier to install Linux very difficult to find CD-based install images these days. Failing that, a laptop with a bootable USB
port can substitute, although that would have been hard to find in the late 90s. Even my forward-looking 600X cant boot
from its USB port, though you can always look for something made slightly later. That said, an optical drive is still a must
for 16 bit Windows games; by then the gaming world had mostly moved on from floppies, although
having a system with both drives, or at least the ability to swap them out like many ThinkPads
can, would be ideal.
Third, if you want to run any sort of modern
applications, look for a Pentium 4. Youll pay a bit more, though. Finally, most of this applies to old desktops
as well, so if you swing that way, youll find things similar but a bit easier. Ive actually got an old desktop from this
same era that I might do a separate video on as an addendum to this, but the basic gist
of things is that its easier to find old desktops with standardized hardware and great
driver support, or build one yourself.
Now before you rush out to buy your own individual
components, just know that the costs of building your own old PC dont scale well youre going to spend a lot
more than $20, though you can probably still keep it under
$100. But it might make more financial sense to
just buy something pre-built and customize it. I personally love old laptops like this, though,
specifically because theyre locked in time. Theres always temptation with a desktop
to upgrade it, expand it, and modernize it just to get that one more game running or
get a few more frames per second and before you know it, youve just got a modern PC.
Laptops are more like game consoles they
are what they are, and seeing what they can and cant do is part of the fun of owning
an older one. So thats it, I hope youve enjoyed this
look at my ThinkPad 600X, and maybe itll inspire you to try to do something with some
old hardware youve got lying around as well. If youve got any good ideas for repurposing
an old laptop, leave a comment below, and dont forget to hit that subscribe button
if you havent already. See you next time..
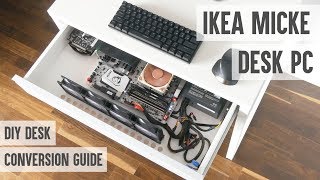 In this video I'll show you how to convert
 What's up guys, I'm randomFrankP, today, I'm gonna be showing you how to build a gaming PC step by step This is not restricted to just a gaming PC any PC you'll be building will be following these instructions And I know that thought of this if you don't know what you're doing could be very intimidating, but honestly It's probably a lot easier than you think and I'll be going through all the steps here from start to finish And I really hope it helps you out if you see any the products or hardware you like I will have everything you see Listed in the description down below so you can check it out but let's start this off the case you're gonna be using for this is the Corsair crystal series 5 70 X. RGB case it is ATX so we're going with an ATX build And I love the all tempered glass look to it now first things first Unboxed your motherboard because this is where the majority of the build is gonna Take place carefully take it out of the anti-static wrap and place it on top of the box for now But before you do anything else because this is something that is easily forgotten take the i/o shield from the motherboard box Simply snap this into place on the back of your PC case like I'm showing here This is we're gonna have access to all your motherboard supports and connections and trust me just do this now So you don't forget it later on after the motherboard is already installed Next it's time to grab your CPU. And the processor itself along with most likely a fan will be inside the box now be very careful when handling this because the bottom of the chip is Very fragile in the entire build could get ruined if this gets damaged as you see here on this Ryzen 7 1700 CPU the pins are very tiny and fragile back to your motherboard pull the lever on the socket Backwards to open it up now on the CPU. You'll see a little arrow in the corner But so you can align it with the indicator on your motherboard for a proper install in the right orientation Gently place it down Do not add force if it doesn't just lay into place pick it up and realign it remember be very careful then from here you Close the shield and the lever to secure the chip now it might seem like you're adding a little excessive force when you're closing this Lever, but don't worry.
 - Hey guys, this is Austin. I might be slightly sick
 Hi this is Phil from Make Tech Easier
 [Whapoosh]. Top o' the mornin' to ya, laddies! My name is Jacksepticeye, and welcome back to PC Building Simulator! [Instrumental rock playing]
 Hey, how's it going? Dave 2D here. So Xiaomi recently announced their Mi gaming laptop and it's a product I think a lot of people would be interested in because Xiaomi makes some really good stuff for a pretty good price. This is their Mi Notebook Pro. I've done a review of it.
 This is a $20 laptop. It was a thrift store find, and I got a little